
Theme Customizations
blogstatic DesignStudio
Settings > blogstatic DesignStudio
The blogstatic DesignStudio is a customization tool that lets you change the styles and fonts of any theme on blogstatic. It's particularly helpful if your aim is for your blogstatic blog to match the styles of your existing website.
It consists of three parts:
- Theme
- Colors
- Fonts
This feature, in its full capabilities, is available on the Expert Plan and above. Under the Starter Plan, only changes to the Theme section will be published on the live blog.
When customizing your blog, the new styles and fonts will not reflect on your blog until these customizations are published.
Also, all adjustments are interchangeable between themes. Setting these customizations on one theme will make them available to any other theme you choose to switch to down the line.
Read here about the story behind blogstatic DesignStudio and how it came to be.
Below is a video if you prefer a visual guide instead.
And here's a longer 11-minute version of the video above that covers every detail.
Otherwise continue with the written description of every section.
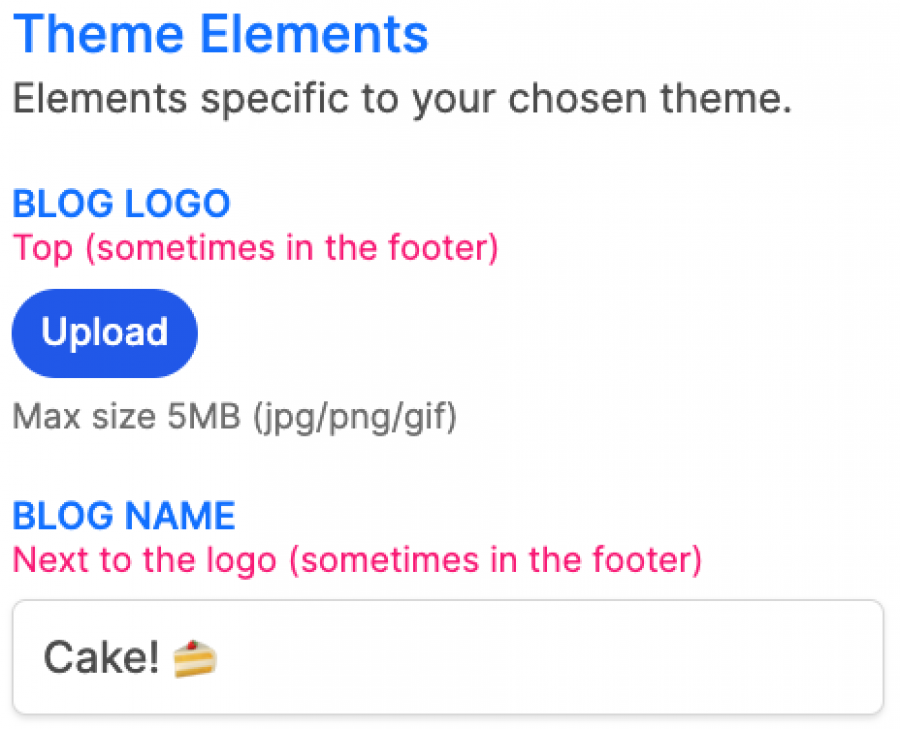
Theme
The "Theme" section allows you to switch between themes, set the default mode (light, dark, or system) of your blog, upload your blog's logo, and set any other elements (depending on the chosen theme) such as the cover photo, hero section titles, and descriptions, as well as any third-party scripts if the selected theme allows it.
Temporary Content
In this section, you can choose to temporarily populate your blog with placeholder content, which is helpful when creating a blog and you want to see how it will potentially look when filled with content.

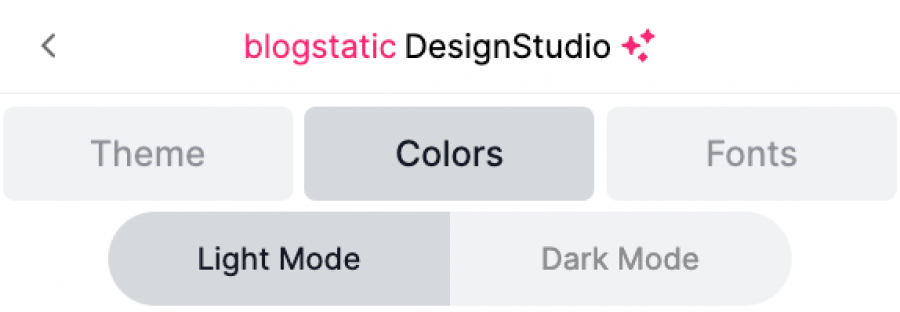
Colors
The "Colors" section gives you the ability to change the colors (and sometimes various border sizes and widths) of all elements on your blog.
Through built-in color pickers and sliders, you can assign various colors and values to your blog.
This section is divided into two parts:
- The "Flairs" section, allows you to select any pre-made styles
- The "Custom Modifications" section, gives you the ability to modify the colors and other values of any single element on your blog.
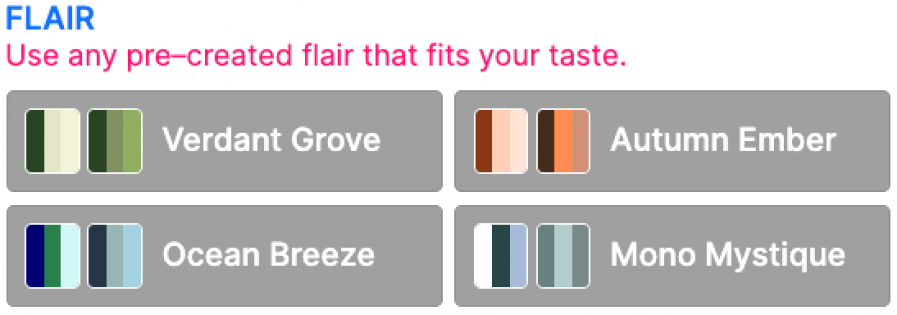
Flairs
The "Flairs" section provides you with a ready–made color scheme, with preset styles for both modes, light and dark.
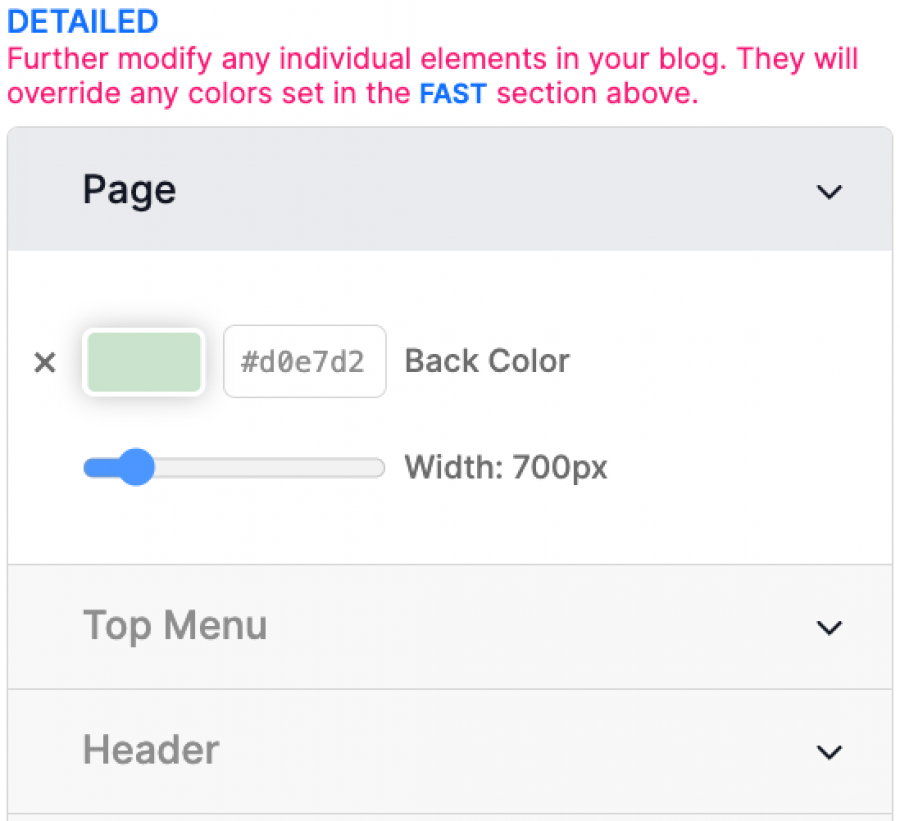
Custom Modifications
This section is for those of us who want more control over how every element on our blog will look, whereas the "Flairs" section gives us the ability to quickly assign ready–made styles.
Furthermore, this section is divided into two parts:
- Fast
- Detailed
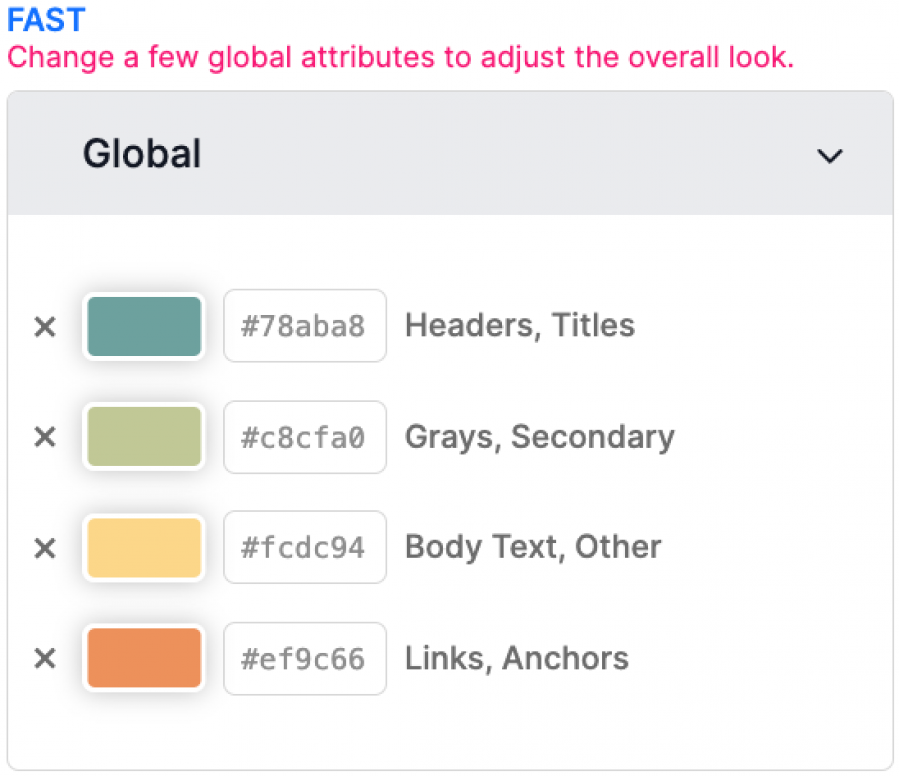
Fast
The "Fast" section gives you the ability to quickly adjust a few components that affect the majority of elements on the page.
Detailed
The "Detailed" section gives you the ability to adjust every single element across the board. This advanced approach if for those of us have the time to customize each element on the page individually.
Tip: You can choose a ready-made flair and further customize its elements via the "Custom Modifications" section.
Further modifications
In addition, if these options do not suffice and you need to further modify a specific HTML element in your blog, you can head over to "Settings > Custom Code > CSS" and add your custom styles.
Fonts
The "Fonts" section gives you the ability to change the fonts and their attributes (size and weight) of all text on your blog.
This section is divided into three parts:
- The "Font Combinations" section, allows you to select any pre-made font pairs
- The "Do It Yourself" section, gives you the ability to further change and modify the appearance of the content in your blog.
- The "Detailed" section, gives you the ability to modify the line–height of the text on a single post/page.
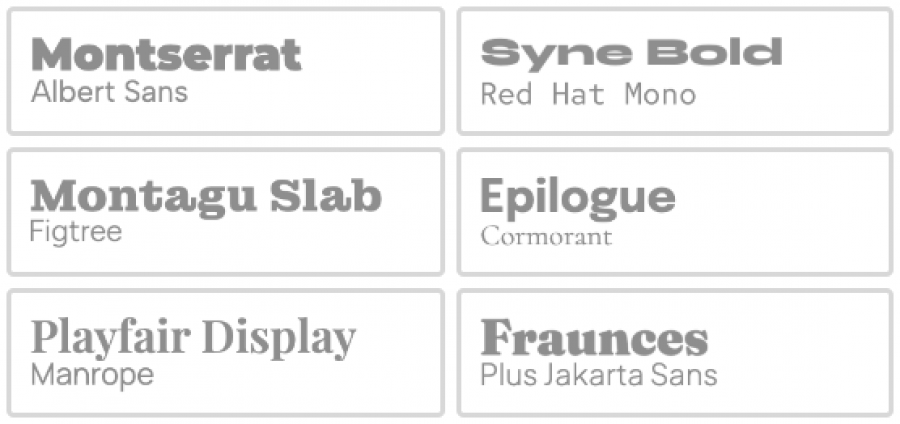
Font Combinations
The "Font Combinations" section allows you to quickly select any of the ready-made font pairs.
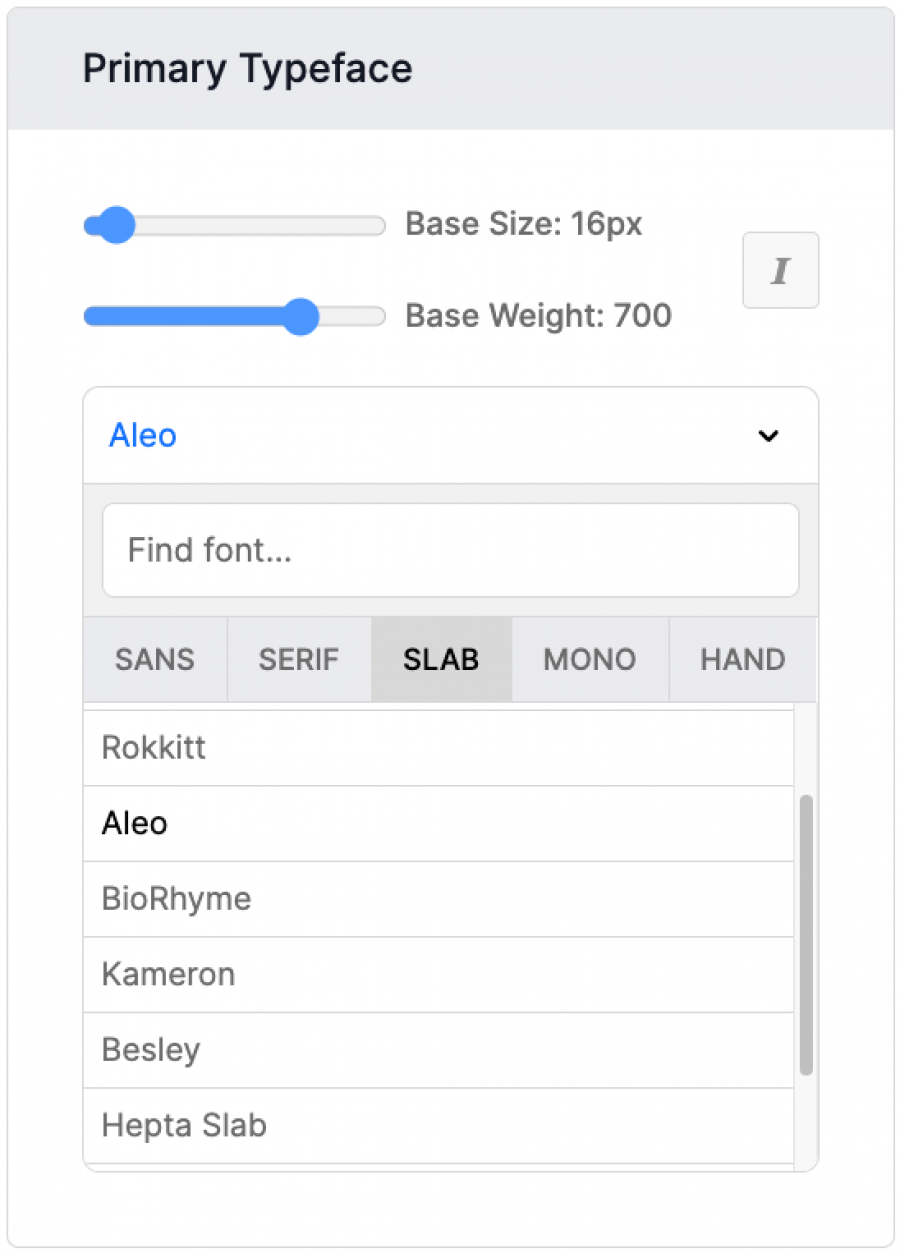
Do It Yourself
The "Do It Yourself" section is divided into two parts:
- Primary Typeface
- Secondary Typeface
"Primary Typeface" fonts are usually titles and headers, with some themes stretching the rules.
"Secondary Typeface" fonts represent mostly all other text elements, such as the body content.
Adjustments on either "Primary Typeface" or "Secondary Typeface" affect the overall relative size of all textual elements of the given category (Primary or Secondary).
Also, if available for a given typeface, each font category can be set to its italic version.
Detailed
Through the "Detailed" section you can adjust the line–height of the body copy when visiting a single post/page. This is particularly helpful when selecting new fonts and needing to adjust the overall readability of your posts.
Notes
Various helpful tips when using the blogstatic DesignStudio .
- Each adjustment is immediately saved and reflected on the preview mode of your blog (to the right side of the customizations panel), without needing to refresh the page.
- When selecting any major changes, such as Flairs or Fonts Combinations, these changes are instant and the system warns you beforehand if you want to override any of your existing manually selected colors or font adjustments.
- Switching between pages on your blog will keep your styles intact, without needing to save, as these are saved automatically after each interaction with the customization panel.
